Feature:
1. Durable: The handheld sewing machine is made of stainless steel and plastic materials, which are lightweight and durable. It has a compact and beautiful design, resistant to rust and damage, and can be reused multiple times.
2. Design Features: The mini sewing machine is easy to operate and has a wide range of uses. It can be used anytime, anywhere without taking up storage space. It is more convenient, economical, and efficient compared to traditional tabletop sewing machines. It can directly sew fabric, curtains, or mend torn pockets.
3. Portable and Convenient: The handheld sewing machine is compact and portable, making it easy to carry and use wherever you go. It is a handy tool for quick fixes and sewing on the go.
4. Wide Applications: It is suitable for emergency use in households and during travel, and can also be stored as a backup in the car. It can be used for mending patches, sewing clothes, aprons, pet clothing. It is highly applicable for fabric, garment, and silk processing.
5. Ideal Gift: You can give it as a gift to your friends, family, or colleagues. It will definitely be a special gift, and whenever they use this handheld sewing machine, they will think of you.
Specification:
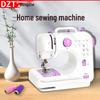
Item Type: Handheld Sewing Machine
Material: Stainless Steel, Plastic
Purpose: Home Use
Scope of Application: Most Scenes
How to Use:
1. Holding the machine: Hold the machine steady by supporting the machine base with four fingers of the right hand, while naturally placing the thumb on the top end of the machine body.
2. Threading: Gently pull the thread from the thread spool. Pass it through thread guide A, then insert it into thread guide B. Next, pass it through the thread guide C. Place the threaded end of the thread temporarily next to the needle, then insert the threading tool through the needle hole from the front of the needle (towards the body joint of the machine). Thread the end of the thread into the small hole of the threading tool, pull it out about 2‑3 cm, press it against the thread plate, and hold it in place.
3. Placing the fabric: Use the index finger of the right hand to lift the presser foot, place the fabric to be sewn (with a thickness not exceeding 0.8mm) flat under the presser foot, then gently lower the presser foot to hold the fabric in place.
4. Sewing operation: Hold the fabric with the left hand, and quickly press down the top end of the machine with the right thumb. Repeat this process by pressing down with the thumb, which will automatically feed the fabric to the left. Gradually move the right hand while holding the machine to the right, and gently move the fabric to the left in coordination with the sewing rhythm until the sewing is completed.
5. Finishing: After sewing, cut the thread with scissors, gently lift the presser foot, and remove the fabric. From the back of the sewn fabric, pull out the last section of the thread, thread it through the adjacent loop, tighten it, and tie a knot to secure the stitches. Avoid pulling the thread too hard to prevent damaging the needle or stitches.
6. The machine can automatically feed the fabric and adjust the tension of the stitches, but it is important to note the following: A. If the stitches are too tight, adjust the pressure nut slightly counterclockwise; B. If the stitches are too loose, adjust the pressure nut slightly clockwise. The diagram shows the correct tension of the stitches. If a larger stitch is needed, pull the fabric slightly faster with the left hand. If a denser stitch is needed, pull the fabric slightly slower with the left hand.
7. Changing thread spools: When switching to a larger thread spool, connect the spare extension rod to the thread spool axle, insert it into the larger thread spool, and secure it with the plastic cap at the end of the rod. Then rethread the machine, adjust the tension of the thread, and proceed with sewing. Using 50‑90 cotton or synthetic thread yields good results.
8. Changing the needle: Loosen the fixing screw, remove the broken needle, and replace it with a new needle. Make sure to align the flat side of the needle with the fixing screw correctly, and do not install it backwards. The needle type is DHX‑14..
Package List:
1 x Handheld Sewing Machine
1 x Thread Spool
1 x Needle Threader